Anybody that begins the quest of starting a Purple Martin colony quickly learns that two major problems almost immediately surface. One is the European Starling. The other is the English House Sparrow.
By now, anybody that has taken the time to educate themselves about purple martins and wants to start a colony knows about the wealthy New Yorker named Eugene Schieffelin, who in the late 1800's, imported and then turned loose all the birds that were in the Shakespearian plays. Well, needless to say, it wasn't the smartest of things to do, but back then, we weren't so aware of the 'politically correct' things to do. Out of all the birds that he brought over, the only two species to survive were the European Starling and the English House Sparrow. Both of these are cavity nesting species and have literally taken over every possible natural opening where our own native wild cavity nesting birds would normally nest. And of course, when we humans put up housing for purple martins, they immediately usurp the house and a nesting cavity and of course, defend it with their lives.
It is now an all out war between the purple martin landlord and the seemingly never ending hoards of these pests that continually come. As a good many know, the S&S is a popular trap, however, being on the larger side, it has troubles actuating quick enough to capture the sparrows.
So, with this in mind, I decided to do a little investigating on the trap and see what I could do to make it just a little quicker.
The first thing I decided to do was downsize it to specifically fit the sparrow. If the larger one was too slow, what could be done to make the mechanism a little faster so we could catch some of the sparrows that are plaguing everyone. What I've done is make the trap 'specific specific'. In other words, I made it to trap sparrows and not starlings. I made the access hole 1 1/2" in diameter and that means all the birds that normally look for holes of that size will fit in it, including the sparrow. However, I wanted to do one more thing with it. I wanted to be able to place it directly in the middle of a martin colony without the worry of catching a martin. The 1 1/2" hole should accomplishes this. Most of the time, when the martins get back in numbers, the rest of the birds will leave. But the sparrow is a very tenacious bird and will take up residence right in the middle of a martin colony without fear. Sparrows are actually a member of the Weaver Finch family and because of the way they build their nests, (filling the compartments with materials to overflowing), the martins won't even enter the compartments, therefore; they get away with it and are not bothered by the martins. However, they in turn won't show the same respect for the martins. They'll vindictively go from compartment to compartment, pinning (pecking holes in) the eggs and even killing the young. This is one of the reasons these birds have to be trapped and destroyed.
So, within the following page, I'll try to show and describe what can be done to make a smaller version of the S&S trap, make it specifically for the sparrows and then put it right in the middle of your colony. Now, that's not saying that it has to go there, but that's just one of the options. It can just as easily be hung under the eaves of a building or on a stand alone pole or where ever you want to put it.
Let me also add, this trap works best during the nesting season, when these little vermin are out looking for a place to nest. That's not to say it won't work at other times, but since it is designed to act like a good cavity to nest in, then that's when it works best.
Let me also say one other thing. This (or any other trap for that matter) should be checked daily. Every once in awhile, other cavity nesting birds will get in it and they need to be released unharmed as quickly as possible.
Trap components:
1- sheet of 1/2" exterior plywood or one 10 foot long Western Cedar board.
2- dozen 1 5/8" long treated bugle head decking screws
1- gallon Mayo or Miracle Whip jug. (Plastic).
2- small 1 1/2" hinges
2- very small diameter nails. I used small finish nails
1- small piece of .040" thick aluminum, about 10" square should suffice
4- very small washers
3- #6 x 1/2" long sheet metal screws
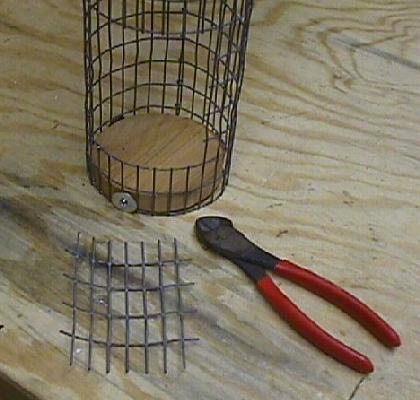
2- sq ft of 1" x 1/2" welded wire screen
1- dozen short roofing nails
1- stick (piece) of 4" diameter thin wall PVC tubing (8 feet long)
1- can of black spray paint (If you want the tubing to be black)
1- empty 35 mm film canister w/cover
1- small box of BB's, yes the kind that go in BB guns
1- 1 1/4" long 1/4-20 bolt, 2 flat washers and a wing nut
1- 2" long piece of 1/4" all thread, another flat washer and wing nut
2- feet of small diameter flexible wire. (small electric fence wire works good).
Tools required:
- drill motor with a good selection of drill bits
- a 1 1/2" hole saw
- jigsaw with wood cutting blade (scroll blade)
- pair of tin snips to cut the aluminum
- metal file
- pair of wire cutting pliers
- pair of good needle nose pliers
- hammer
- screw drivers (I use a Phillips drive inserted in my drill. Much easier and faster).
Before we begin making your trap, we need to assume a couple of things.
One, that the maker has basic wood working tools and knows how to use them.
Two, that the maker understands a little about working with wood.
Three, that by looking at a picture, the viewer understands what is being said or shown.
And four, the maker can follow written instructions.
So, with that said, let's build a sparrow trap.
The Frame:
First, you need to find the material you want to make it from. 1/2" thick exterior plywood will work good (If plywood is used, predrilled holes must be used in any edge screwing). I like to use Western Cedar because it's readily available to me, it's light, very easy to work with and it will last a long time out in the elements. White pine will also work if treated and then painted properly.
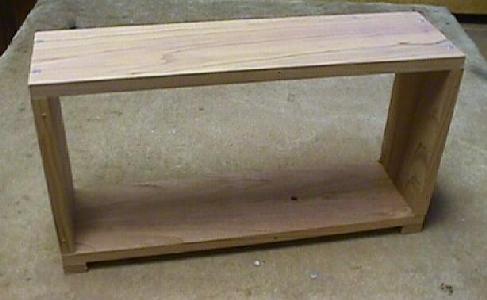
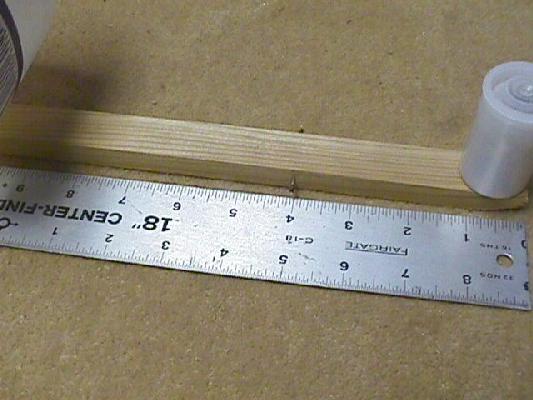
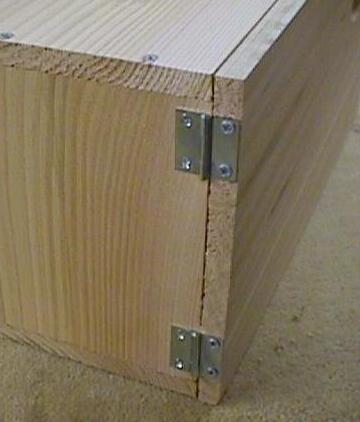
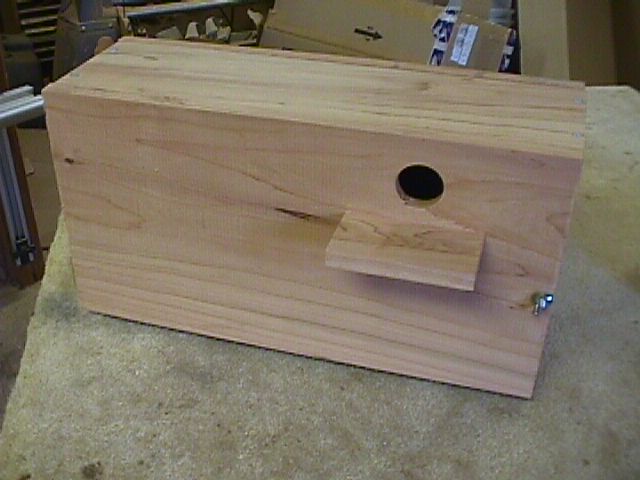
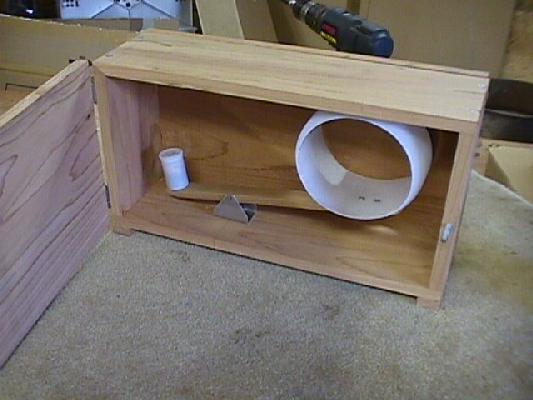
The first thing to do is make the trap frame. The outside dimensions are 18" long, 10" high and 5 1/2" wide. If you get 11" wide cedar or pine, this can be made by cutting the board right down the middle. (The 5 1/2" is plenty for sparrows). I added a couple of "foot" boards, one under each end because later in the design, a wing nut will be under the assembly and these feet will let it set flat on the table.
When done, your frame should look like the one below
The jug:
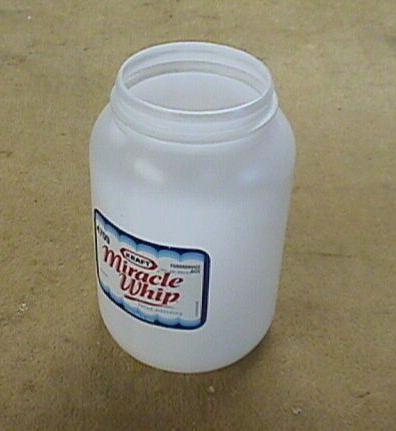
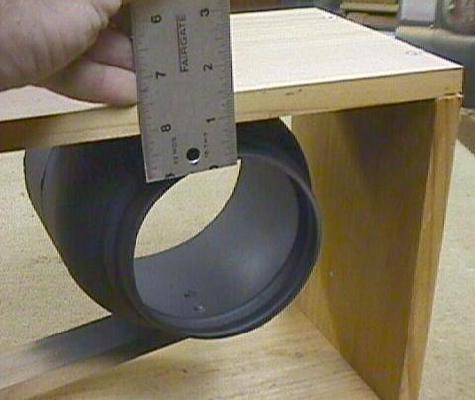
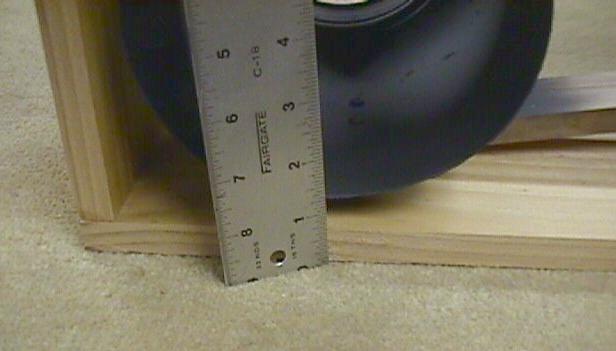
Since your trap body is only 5 1/2" wide, the jug required to fit in this trap has to be as close to between 5 1/8" and 5 1/4" long as you can get it. I used my table saw to cut mine because it's accurate, but you can use a good sharp pair of scissors or even a Dremel tool with a cutting blade on it.. Mark it very accurately first and then follow the lines closely.
Obviously, not everybody has table saws, so here's a simple way of marking a round jug...
Stack a couple pieces of wood on a flat surface to form the desired height you want. Now, lay a 'Sharpie' pen on its side on this stack of boards and with the jug standing up, slide the jug up to the pen. Now twist the jug and as you turn the jug, this leaves you with a nice level line on your jug. Repeat for the second line at 5 1/4". Now you should have a tube that is nice and even...and square.
As you'll no doubt notice, some of the jugs look different. I found that if I left the neck (top) of the jug on, it gave it more rigidity and held it's form better. It also worked just fine to snag the sparrows. When you get to drilling the front hole to the trap, simply use whatever jug style you decide on.
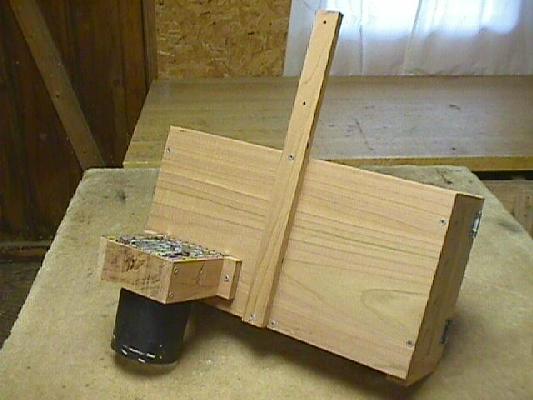
Next, let's build the counterbalance mechanism.
The secret to quick actuation is the lightness of the materials used to make the counter balance. The board required is 12" long, 1 1/4" wide and approx 3/8" thick. Whatever you use, this piece of wood has to be very light. White pine will work, but plywood is not a good material to use here. It's just too heavy. If you have to, turn a 1 1/4" piece on edge and run it thru your table saw (if you have one) and this will give you the 3/8" thickness you need. On one end and along the centerline of the board, pre-drill 2, 1/16" diameter holes, 1 inch apart starting 1/2" from the end of the board. These will be used to mount your jug. On the other end, pre-drill 1 more 1/16" diameter hole to hold your counter balance weight. (Film canister).
Mount the jug
At the center point of your jug, mark and drill two clearance holes, 1/8" in diameter and 1" apart. Using 2 #6 x 1/2" long (or 3/8" long if you can find them) Phillips head wood screws, carefully screw the jug in place as shown. A stubby screw driver works wonders here.
Now in the center of the bottom of your film canister, drill another 1/8" clearance hole. Take the cap off and using a #6 screw, screw it in place as shown. This becomes the 'weighted end' of your 'teeter totter'.
Now, 4 inches from the "weighted" end, drive two small nails into the side of the board at the 4" mark as shown. Leave them sticking out about 1/4". If you use nails that have heads on them, snip them off with a pair of wire dykes. I used very small finish nails, they have very small heads and work very good. Make sure they are directly opposite each other, forming a straight line between them.
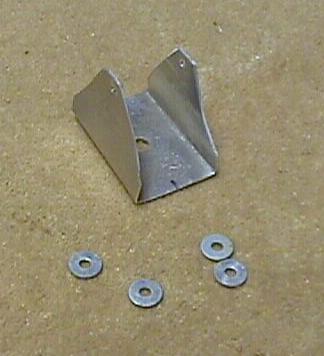
To make the pivot bracket, first cut a piece of aluminum, 2" wide x 6" long. It has to be bent to the shape as shown above. The distance between the two side arms is 1 3/8" if you cut a piece of wood 1 3/8" wide, the aluminum can be folded down over it giving you the required inside dimension. This piece doesn't have to be super strong. It's the vertical sides that create the strength in the piece and for this purpose, it will do just fine. Next, mark and drill 2 holes just barely larger than the nails, 1 1/2" up from the bottom and in the center of each bracket arm. Be very accurate otherwise the pivot arm will be 'skewed' in the trap. Then using your tin snips, cut the alum to the approx shape as shown above. File or sand away any burrs and sharp edges.
Finally drill a single 5/16" diameter hole in the bottom center of the bracket. This hole will be used to attach the balance mechanism to your trap so do it accurately.
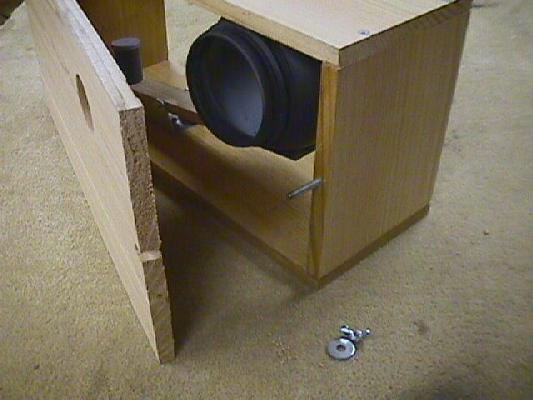
Next, put two washers on each of the nails and then slightly spread the bracket arms and alternately insert each nail into its hole. Make sure the washers are in place and that the bracket arms are not pushing inward on these washers. If they are, lightly force them outwards until they are loose. The washers are only spacers and prevent the arm from rubbing on the bracket, so they should not be tight at all. Now, place the unit in the frame for your trap. Carefully position it in the frame making sure it will pivot through the full range of motion required to operate. (I filled my canister with BB's so that it made it easier to work with). Make sure it sits squarely within the frame. By moving the bracket around, position the balance so that the jug is fully within the edges of your frame when operated. Once you get it located, left to right and front to back, carefully mark the 4 edges. Now, disassemble the bracket, reset it in the box per the lines you drew and mark your hole thru the hole in the bracket on the inside of the frame. The hole has to be drilled from the outside of the box, so you now have to transfer that hole marking to the outside of the box. I drew a line at right angles to the mark and transferred the mark to the underside of the box so I could drill it. A small speed square will work wonders in this situation. Once marked, use a 5/16" diameter drill and carefully drill the hole to mount the pivot bracket. Now, add your 1/4-20 bolt and washer to the bracket, reinstall the balance beam, and insert it into the trap and then add another washer and wing nut from the underside to hold in place. After verifying that you again have full range of operation, everything is clean and clear of obstruction, tighten the wing nut from underside.
Now you know why the need for the 'foot boards'. You can now set the box on the bench and the foot boards hold it up off the wing nut.
I made a couple of these traps and in some, I painted the jugs black so that it would give the illusion of a dark interior. I know sparrows don't care about shiny surfaces, but just in case, I left a few that were unpainted and shiny just to see if it did matter. [It didn't]!
Now, let's add the front door.
First cut the door from one piece of wood, big enough to cover the entire front of the frame. (Should be 18" x 10"). Before drilling any holes in the front door, measure down from the top of the frame to the very top of the opening of the jug. This will be the same dimension for the top of your hole in your front door. Now add another 3/4" to get the center of your 1 1/2" hole.
Example: Mine measured 1 1/2" + 3/4" = 2 1/4" from the top of the door down to the center of my 1 1/2" hole.
Also measure horizontally from the end of the box to the 'center' of the jug so that you have both dimensions to locate the hole. Now you can drill your 1 1/2" hole in your front door.
Once the hole is drilled, you'll need to add the hinges...

I used some small 1 1/2" utility hinges and mounted them as shown below.
Adding the latch...
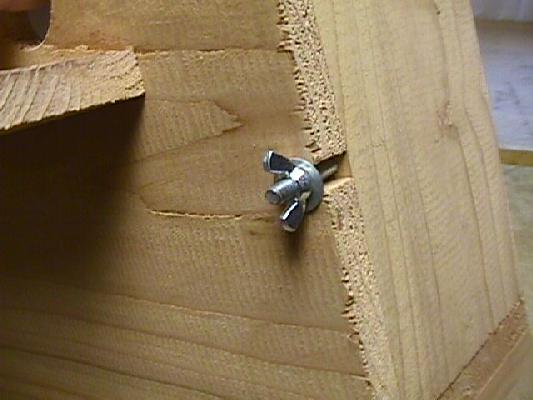
I made a very simple latch to get into the trap. What I did was cut a small slot in the end of the door with my jigsaw. I then closed the door and marked the center of the slot on my frame edge. I then drilled a hole just a little smaller than the outside diameter of my piece of all thread. I then stuck it into my drill and literally screwed it into the hole using my drill. I then released it from the drill, closed the door and then added the washer and wing nut. Works like a champ!
This makes for an easy way of opening and closing the front door.
Now if you like, you can add the front porch so that the sparrows have something to sit on. And with that done, the front of your trap should look like the above.
Now for the back.
Again, repeat by cutting a one piece board for the back panel. (18" x 10"). Then, by pressing down on the jug, measure up from the bottom of frame to the bottom of the jug. The resulting dimension is the bottom of the hole in the back panel. Add the required 3/4" to the center and drill the hole.
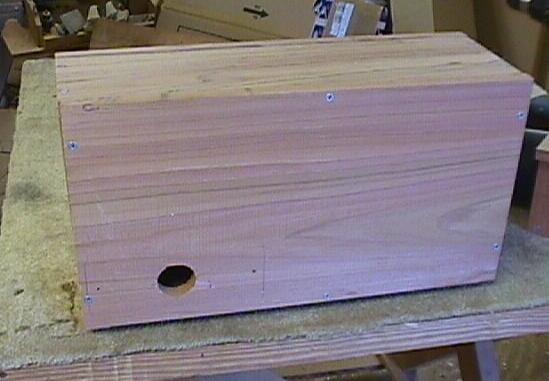
Example: Mine measured 1 1/4" + 3/4" = 2" from the bottom of the back panel to the center of the hole. After drilling the 1 1/2" hole, attach to the back of the frame with screws as shown. The back panel can now be screwed into place.
The Down Chute:
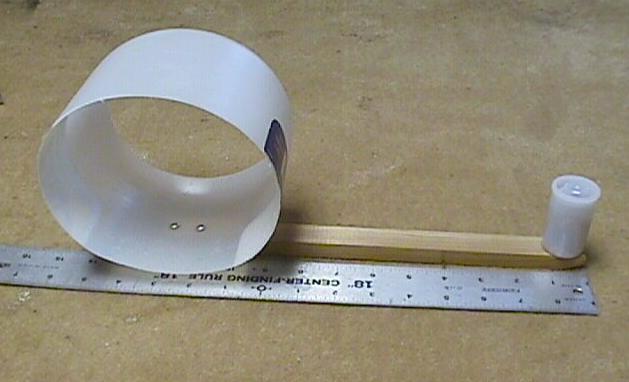
Next, you have to make a down chute for the sparrow to escape the trap and be funneled down to the catch cage... This is done as shown above. The tubing I used is 4" thin walled PVC tubing. (It can be purchased just about anywhere). The outside dimensions to this tube are 4 1/4", therefore, you need to make a frame that has a 4 1/4" inside dimension. The actual dimensions for the boards used here are (1) @ 4 1/4", (2) @ 5" and the long one is 8" long. I made mine all 3" wide. Drill pilot holes and then assemble as shown.
When you purchase your tubing, take note that one end is larger than the other. That is the top of the tube. From the bottom of the tube, cut off a short 10" piece of the tubing. Now, pre-drill some pilot holes and screw it into the wood as shown (freshly cut end up).. Now, test fit to make sure the top of the tube will fit over the short piece in the assemble.
Now, you need to cut your 1 1/2" hole in the back of the assembly. Using your hole saw, carefully cut the hole making sure it goes through the tube. Be careful that you don't hit any screws when drilling the hole.
Next, cut a piece of 1/2" x 1" cage material and add it on the top of the assembly as shown. I used short roofing nails to hold it in place. 1/4" wire cloth will work just as well...
Now, add the finished assembly to your trap by screwing it in place with two decking screws.
OR...if you don't want to spend the time to make this little assembly, you can spend the extra money and get a 90 degree flange that fits the pipe...your choice.

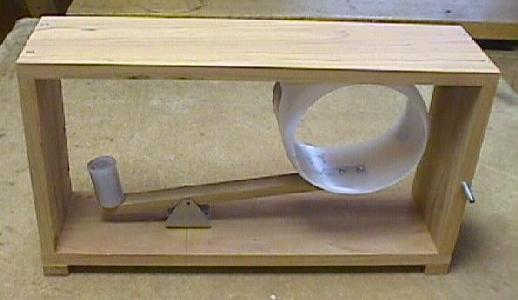
The trap from the front with the door open.
At this point, your main trap body is complete. Set the entire unit on the edge of a table with the down chute hanging over the edge, open the door and double check your balance mechanism inside and make sure it is still operating properly. You don't want to accidentally drive a screw too far through the back and hit any part of the balance mechanism or it won't work properly.
Fine Tuning The Trap:
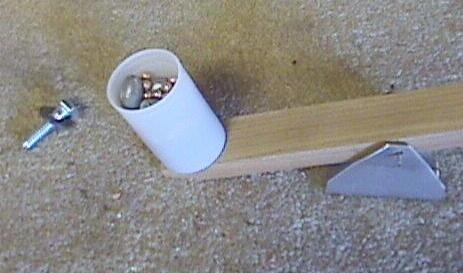
Now, what you need to do is fine tune your trap. This is done by adding or subtracting BB's from your film canister. I used fishing sinkers to start out with because lead is heavier and will take up less room. Then, when I got close to the required weight, I used BB's to fine tune it. Make sure everything is level when fine tuning the "trip" of the jug. When done, as little as a quarter and usually about a quarter and a nickel should trip the trap. It should then slowly return to the top when they are removed. When this is accomplished, put the top on the film canister and the fine tuning is complete.
The following are the numbers you need to work with. They are translated into pocket change so that the average person can use them to tune their trap... Although this trap wasn't designed for starlings, the numbers are here just in case you want to make a larger version and use it for them. The starling version is 9" wide, has a jug that is 8 1/2" long and has 2" holes instead of 1 1/2".
Please note:
DO NOT put the starling version within your martin colony or anywhere near where martins will go. It will catch your martins and you do not want to do that...
The weights are not exact but are within 2
grams. This should provide you with a pretty good method of testing your trap.
All of these are single coins:
quarter = 5.5 grams
nickel = 5.1 grams
penny = 2.7 grams
dime = 2.3 grams
These weights were taken from actual weighed Starlings and Sparrows:
male sparrow = 1.1 ounces or 30 grams
starling 1 = 3.0 ounces or 86 grams
starling 2 = 3.1 ounces or 90 grams
starling 3 = 3.2 ounces or 92 grams
For example, 5 quarters and 2 dimes would be the approximate weight of a male
sparrow.
Likewise, 15 quarters and 2 pennies would be the approximate weight of a starling.
Obviously you want your trap to 'trip' as quickly as possible so work to get it to trip with as few coins as possible. But if it trips with numbers less than the above, it should work just fine...
Now, you need to add an attachment board. This is the method used to hang your trap to where ever you plan to put it. I simply stuck a board on the back of mine at the centerline of the trap so that I could screw it in place when I hang it. You can make this board, (size and shape), to fit your own needs. I made mine so that I could put the trap on a 4 x 4 post or on the corner of a building or where ever I wanted to put it.
Painting:
If you plan to paint your trap, a good coating of Latex Primer and then a couple good coats of good White Exterior Latex will make things really look good and will help make it last a lot longer. I make the down spout black so that it is less conspicuous.
The Down Spout:
Now, lets make a down spout. This is the part of the trap that will deliver the trapped birds to the cage near the ground where you can get at them...
On the bottom of your tube, (where you cut the 10" piece from), is where we're going to attach the cage. The flared end of the tube has to be up so that it can be slid over the piece in the down chute.
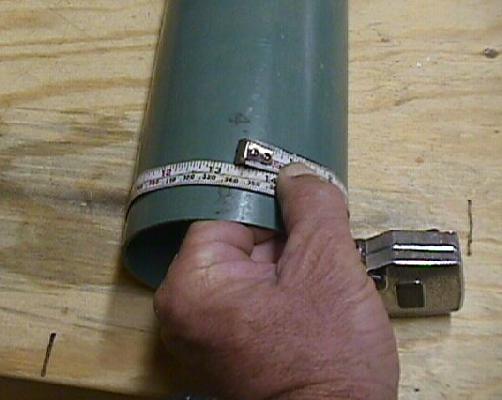
First, you have to measure the circumference of your tube. If you have a normal tube, it should measure about 13 1/2".
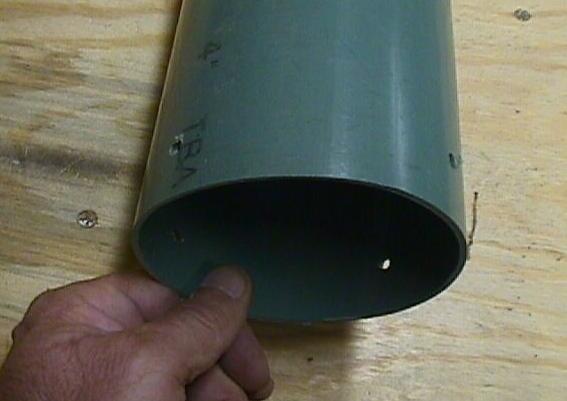
Next, drill about 4, 3/16" diameter holes equally spaced about around the tube and about 1" up from the end.

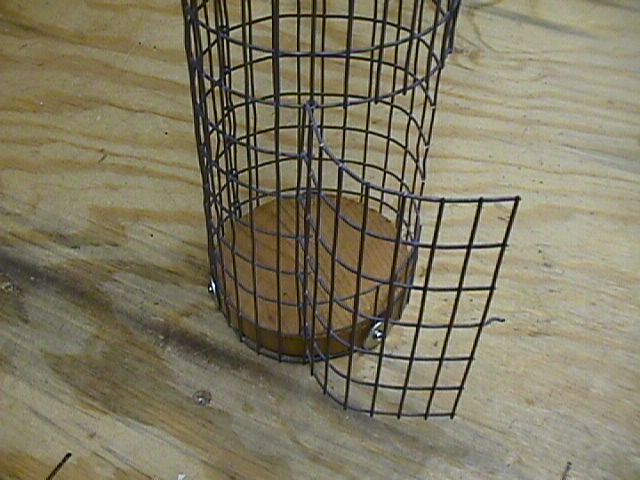
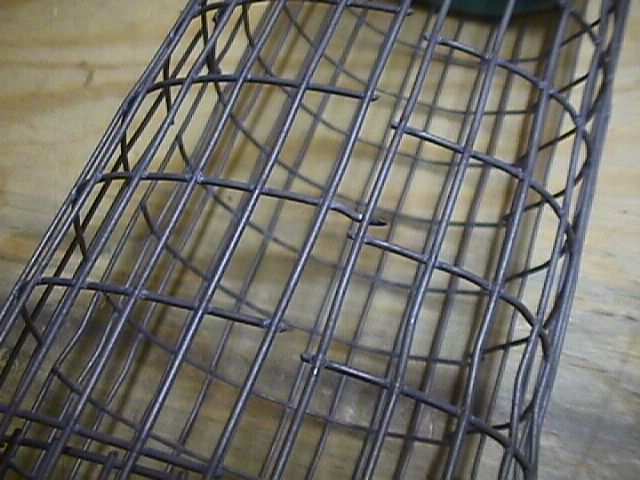
Now, cut a piece of wire cage 12" high and 14" wide. Leave the ends of the wires on one side. The ends on the bottom are not required and can be sniped off clean to the bottom cross wire.
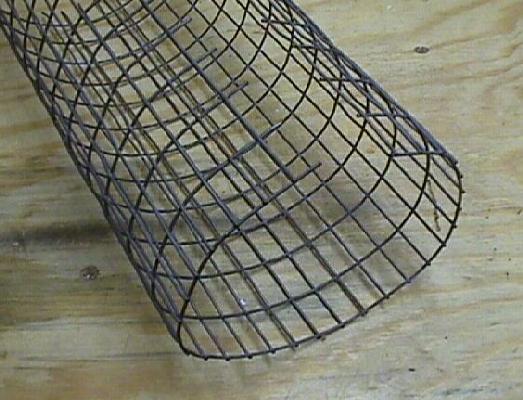
Roll the cage until the ends almost meet.
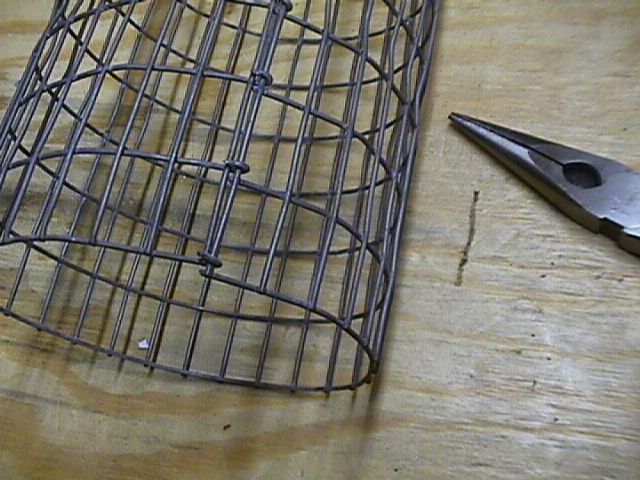
Using a pair of needle nose pliers, curl the ends of the wire around the first vertical wire so that the cage is now closed.
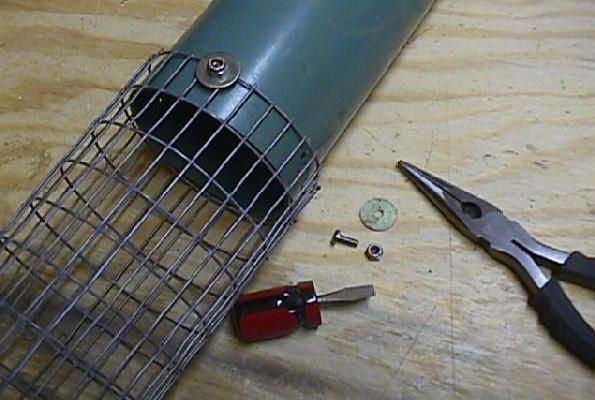
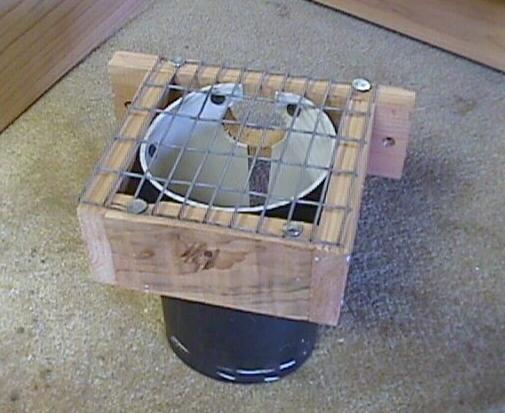
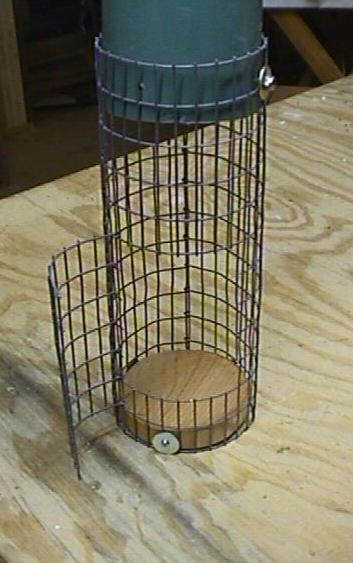
Now, using some small screws and some large fender washers, attach the cage to your tube as shown above.
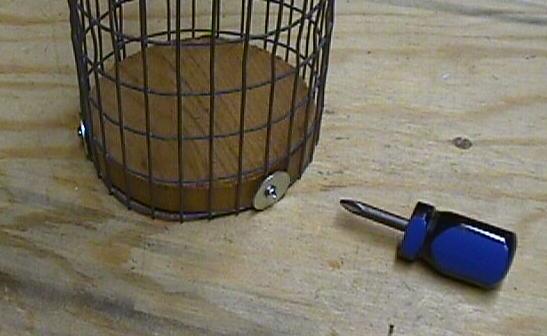
Measure the inside diameter of your screen and then cut a round piece of wood to match. Place it inside the cage and then pre-drill some holes for at least 3 screws. Stick on some washers and screw the bottom in place.
Using your wire dykes, cut out a piece of the cage large enough for you to easily get your hand inside the cage. Cut as close as you can so there isn't any long sharp edges to catch a hand on. I used my Dremel tool to grind off any sharp points. A small metal file will do the same thing. Don't need to scratch up the hands and arms taking out the caged birds.
Now cut a door that is 1" taller and 2 full sections wider than the door you cut out. Leave the 2 end wires on the left side and remove all the others. Remove all the right side wires except the middle one. On the left side of the door, bend the two end wires around the left side vertical of the door to form a hinge.
Now, form the single wire on the right side of the door to form a small hook so that it hooks under the right vertical wire of the door. Now, form the door so that it has some spring to it. That way, the springiness of the door will keep it latched. When you want in, all you have to do is squeeze the door and open it.
When you're done, you should have a cage at the bottom of your tube that looks like the one shown above. Now, what you have to do is practice opening it with one hand and reaching in with the other while not allowing your hard caught prey to escape... a trick in itself.
One note:
Now that the project is done, inspect the entire cage and use a small metal file to clean off all the little ends of wire that might have gotten missed during the build cycle. It'll save a lot of scratches to your own hands and arms.
Now all you have to do is place your trap where you want to put it. Put it high enough so that when you slide your down spout onto the down chute, that the catch basket is about hip high. Makes it easier to work with.
Once I got the trap up and set, what I did was set the tube in place. Then I marked the post under one of the upper wires on the cage. I then drove a sturdy nail into my post and then, once I raised the tube back in place, I "hung" the back of the basket on this nail. It makes for easy removal if necessary and the head of the nail keeps it in place.
And that's all there is to it. This trap can be placed right in the middle of your colony if that's where the sparrows are or anywhere you would like to put it. I know they like corners of out buildings a lot. They seem to look for little nooks and crannies or little holes that they can nest in. Just BEWARE. Bluebirds and other small cavity nesting birds will also be looking for the same thing, so make sure you monitor your trap very closely and let them go when they get caught. Usually one or two trips down the tube will make them look elsewhere. If you are going to be away from the trap for any length of time, then open the door so that any desirable bird can escape should it get caught. Yes, you might miss a sparrow or two, but you don't want to kill the natives. That's the whole reason for building this trap.
One more thing!
If you are not able to build one of these home made nest traps, there is another option. A guy by the name of " Uncle" Blaine makes a repeating sparrow trap that works on the sparrow's food drive. In this case, the sparrow isn't looking for a place to nest, but instead, is looking for food. If you like, go to this web page Uncle Blaine's Sparrow Traps and take a look and see if this will fit your needs. All the information and directions for its use is there.
I also very strongly suggest that if you catch an unwanted sparrow that it be dealt with properly...
Back
to Chuck's Purple Martin Page
This page created and maintained
by Chuck Abare