One question I've been asked a number of times is about Predator Guards. "Are they really necessary"? "What would happen if I didn't use them". Well, the only thing I can say is, if you want to protect your martins, then I strongly suggest they be used. Snakes and Raccoons would simply love to get at your martin eggs and babies and have them for lunch.
Nesting time is the most dangerous time for martins. They are in their nests a lot of the time they are here and once they have eggs and young, they in turn are stuck in that nest until the eggs hatch and the young are old enough to fledge and there's nothing they can do about it for all that time. Predators have an extremely good sense of smell and can locate the source of the smell of young and will do whatever it takes to get at those young.
As far as I'm concerned, snakes are the worst of ground predators and are one of the hardest to keep out of your martin housing. Snakes can go anywhere! Yes, a 5 foot Rat snake will climb a small diameter martin pole in only a matter of minutes and once in your martin housing, will clean it out and won't leave until every egg, baby (and adult martin if they can trap them in the compartment) is gone, period.
Want to see the results!

Yes, I know! There are those that still don't think that a snake can climb a round, slippery steel pole. Well, for those that still believe that, those are baby purple martins that are in this 5 foot Rat snake that was taken out of some purple martin housing. Although the pole did have a guard on it, it wasn't good enough to be effective against a 5 foot rat snake. It simply crawled right up over the guard, up the pipe and into the nest. Trust me! Snakes can, and will, climb a steel pole to get at food and will do so every chance they get. And I can honestly say this! If they are successful at getting to your colony, then your hard earned colony will be gone and will not return.
Commercial predator guards can be rather expensive, especially if you have more than one pole to guard. Also there really isn't a big selection of what I consider effective guards on the market today with only a few manufacturers making them that I know of. Not being one to buy something if I can make it, I saw this as a very simple project that has a lot of benefits for the martins, so I thought I'd put together a page showing just how easy it is to make an effective predator guard that will work and won't cost an arm and a leg. The one you see here cost me around $30. I needed to make 6 of them, so I purchased 2 - 14 foot sticks. I got 3 - 4 1/2' guards from one 14' stick of tubing, thus cutting my overall cost. Your cost may differ a little depending on the cost of materials in your area. As far as I'm concerned, that's a small price to pay for peace of mind, knowing my martins are safe.
Also, the following is a good article on predator guards from the PMCA http://purplemartin.org/update/13(1)PoleGuards.pdf
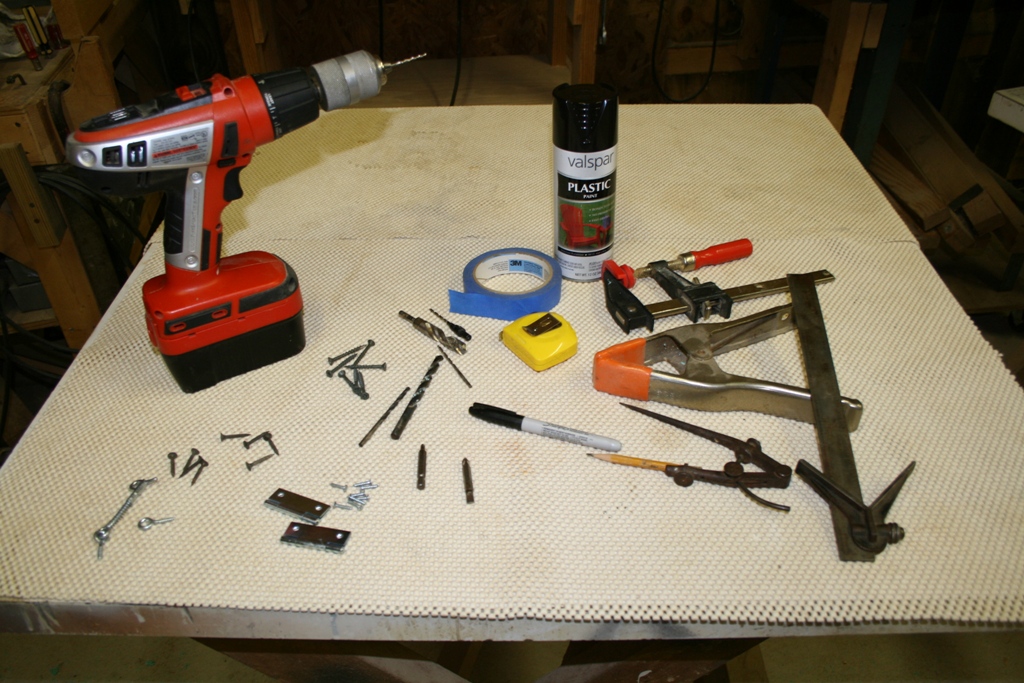
The first thing you'll need are a few tools.
Take a look at the picture below, it shows all the tools needed to make the guard.
The only power tools you'll need are a drill with a number of various bits. One of the drill bits needs to be big enough to drill a hole that will allow the rope to pass thru it.
You'll also need a jigsaw (wood cutting blade) to cut the PVC pipe and top plate.
The general materials list is as follows:
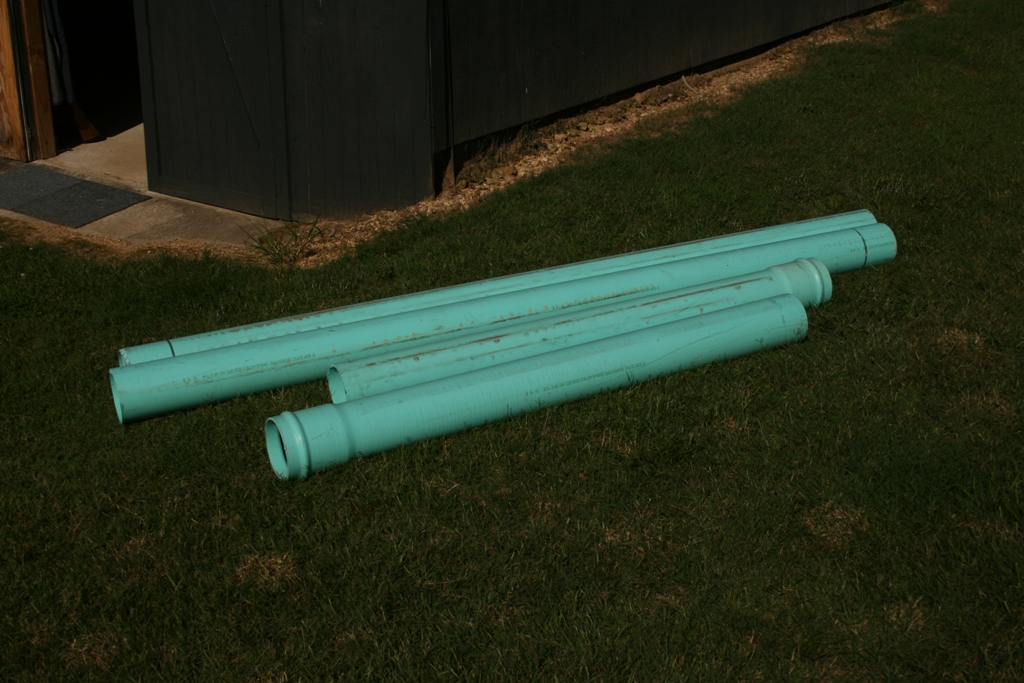
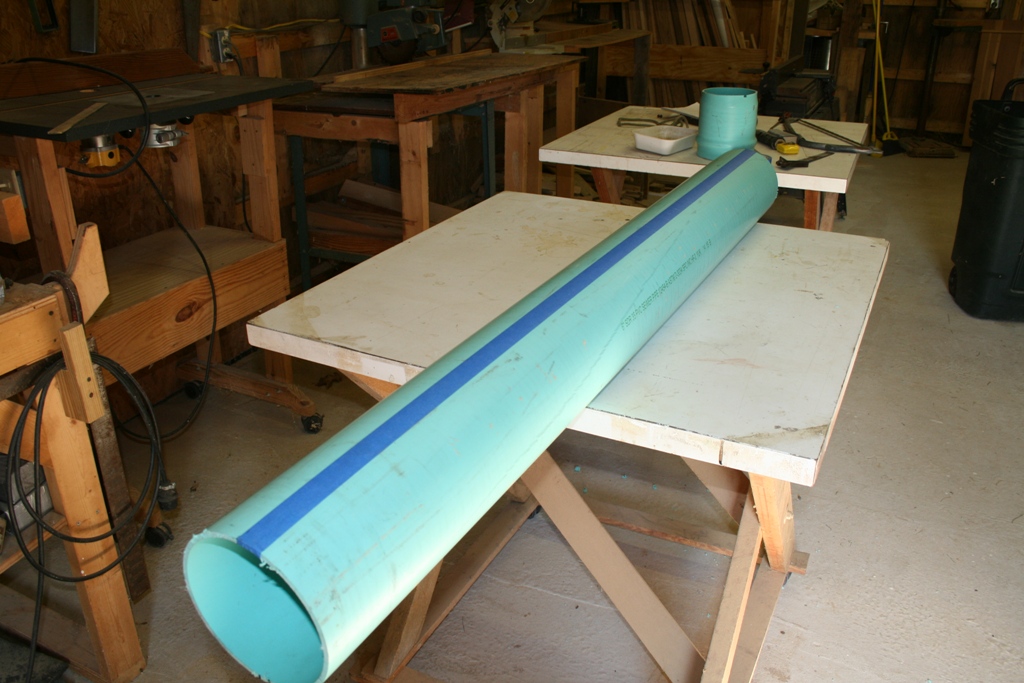
1 piece of 4 1/2 foot long, 8" thin wall PVC sewer pipe. This might be difficult to find, but keep looking. It's worth it.
You'll need one for each predator guard that you build. Most sewer places have this stuff or at least know where to get it. It comes in 14' lengths, so you can make 3 guards from just one piece if you buy one stick. Some suppliers will even cut it for you for a little extra price (in which case, you can skip the following cross cutting instructions).
For each guard you'll need:
1 piece of 8" x 8" x 3/4" thick exterior plywood. Yes, regular lumber will also work.
1 set of 2" hinges.
1 screen door clasp (as shown further down the page).
1 can of "plastic" spray paint. There are a number of different brands, just make sure it's made for PVC. I was able to paint 2 guards with one can of paint.
6 - 1 5/8" long decking screws.
and, although the hinges come with their own screws, I like to use 1" long sheet rock screws. They are a little stronger and easier to install with a drill. If you use these, you'll need 8 per guard.
If you're cutting your own, then the first thing you do is cut your guard to length. As I said, mine are 4 1/2 feet long.
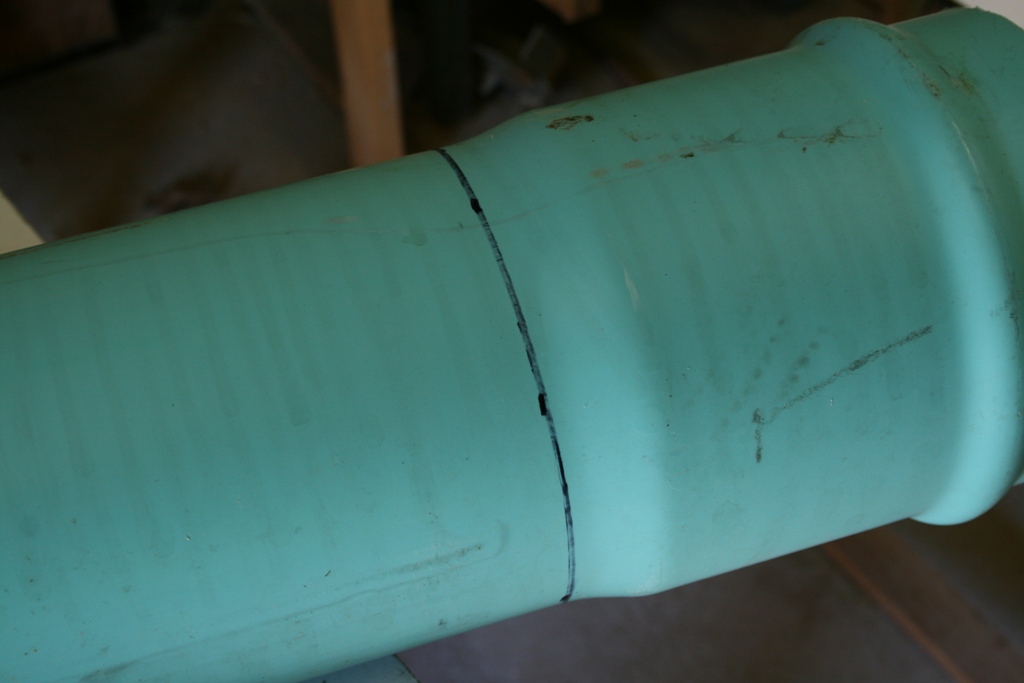
Lay it on a flat surface and measure 54" from the 'non-flanged' end. Make a small mark on the tubing. Rotate the tubing a little, measure and make another mark. Keep doing this till you've gone all around the tube.
Now, using a flexible straight edge, bend it around the tube and connect the dots, forming a line all around your tubing. I used a small piece of plastic sheet that I had laying around the shop that had one straight edge on it.
Next, drill a hole off to the outside of the line you drew and then wiggle the drill up and down until you have a slot long enough to fit your jigsaw blade into.

Now, stick the jigsaw blade into the hole and rotate the tube as you cut the tube. The leftover flange is waste...(at least for this project).
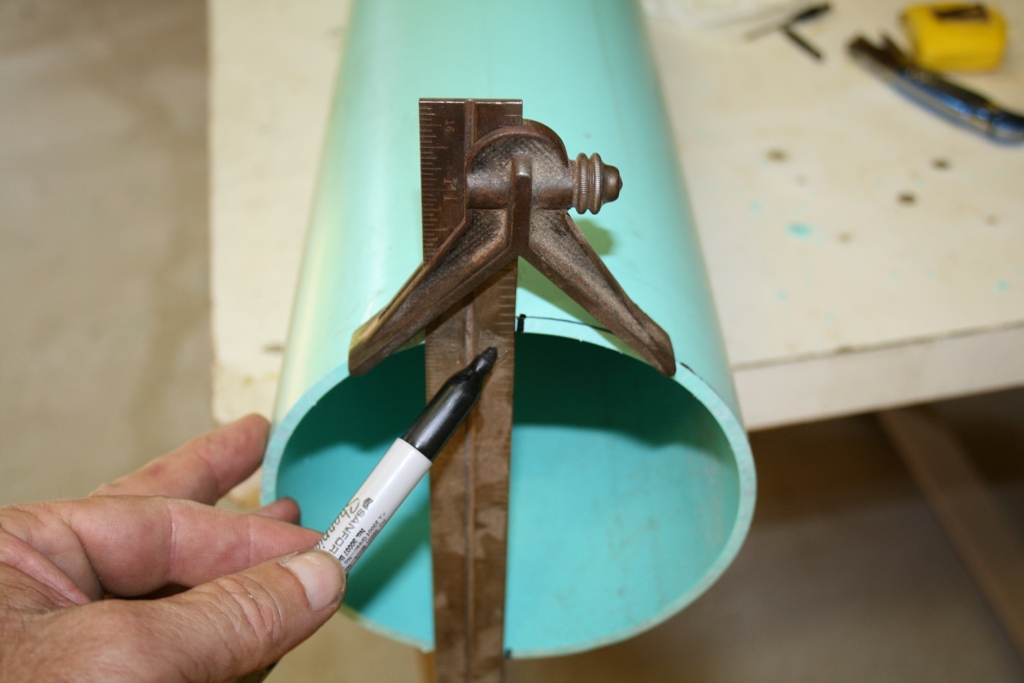
Next, the tube needs to be cut in half, lengthwise. To do this, you need to draw a line thru the center of the tube, marking it on the ends. I happen to have this center finder, but a square set on the work surface and aligned with the center of the tube will also work. Simply lay it flat on the table at the end of the tube and mark the two lines on the end of the tube.
Now position the tube on the edge of a table so that the lines are vertical (straight up and down) and clamp it in place so it can't move. Those same lines will now have to go on the opposite end of the tube. Make sure they line up with the first set of lines or your cut won't be straight.
Next, you'll need a straight line form one end of the tube to the other that lines up with the lines on the end of the tube. To make this line, I used painter's tape. I stuck it on one end, (right edge of the tape on the mark) folding a little under the pipe so it stayed 'stuck'. Then I unrolled it out, pulled it snug and simply laid it on the tube with the right edge of the tape on the corresponding mark at the opposite end of the tube. Then I stuck it down good so it wouldn't move.

Now that I have a straight line on the tube, I simply used my jigsaw and cut along the right edge of the tape, thus cutting the tube along its length.
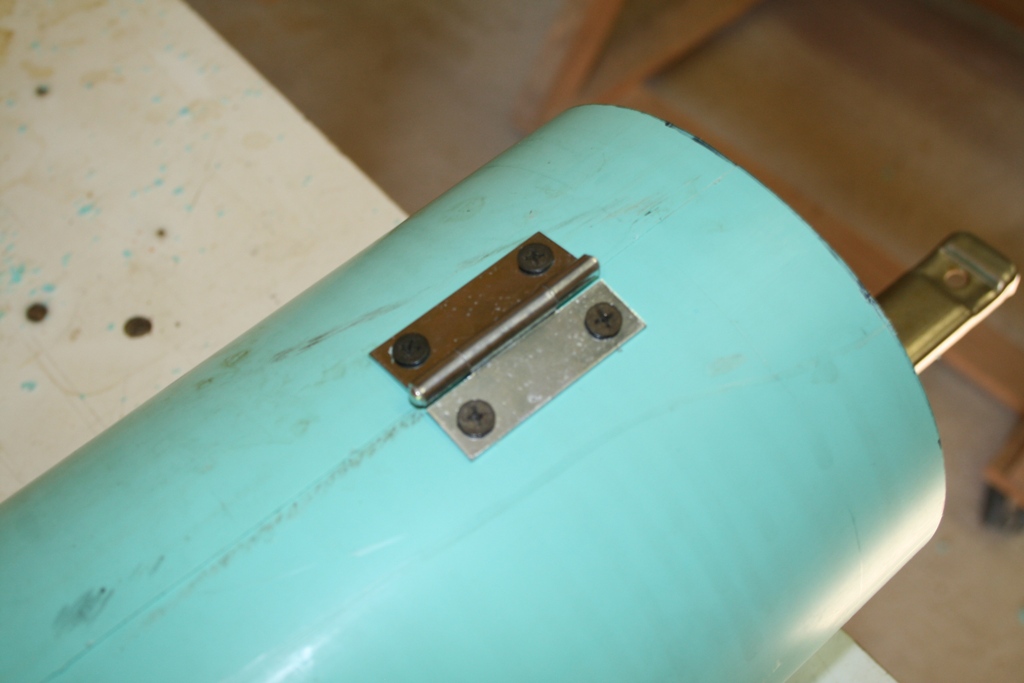
At this point, while the tube is still round and stable, you want to add the hinges. I put mine 2" from either end.
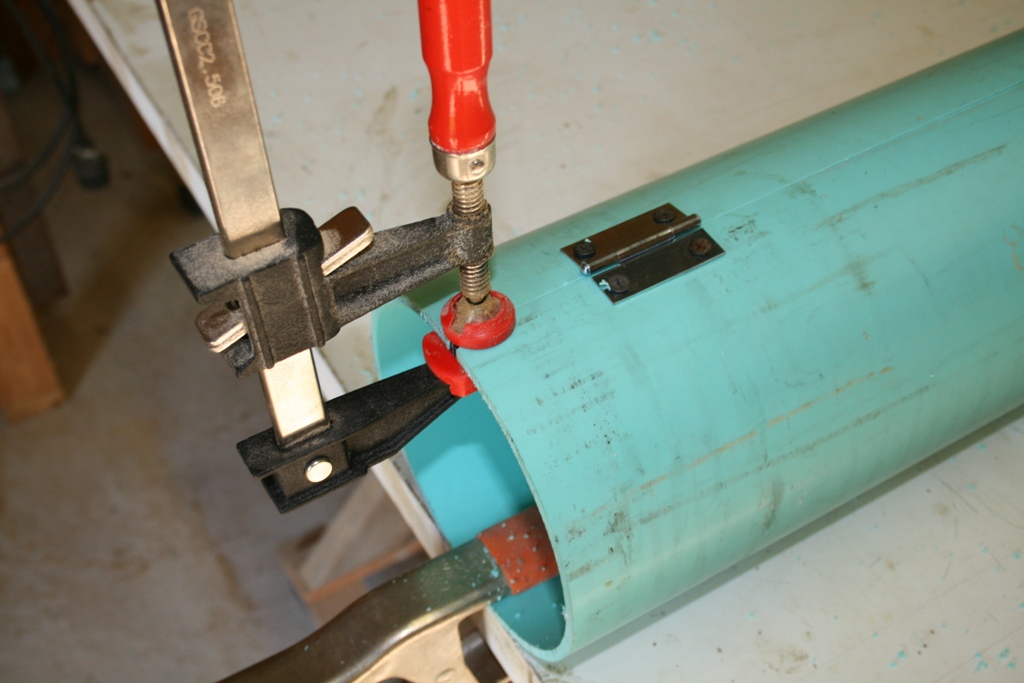
To make it a little easier, I used a clamp to hold the cut edges of the tube together while I drilled my screws.
If you use the screws with the hinges, you'll have to pre-drill some holes for the screws.
However, if you use the 1" bugle head sheet rock screws, they drill their own holes. Be careful and don't strip them, or you'll have to move your hinge to a new location.

Now we need to finish cutting the tube in half.
Turn the tube over. Since the hinges are now on the bottom and hit the table, the tube won't lay flay. To fix this, simply lay a small block of wood under the end of the tube, thus raising the hinges off the table, and now it can be clamped to the table without the hinges being a bother.
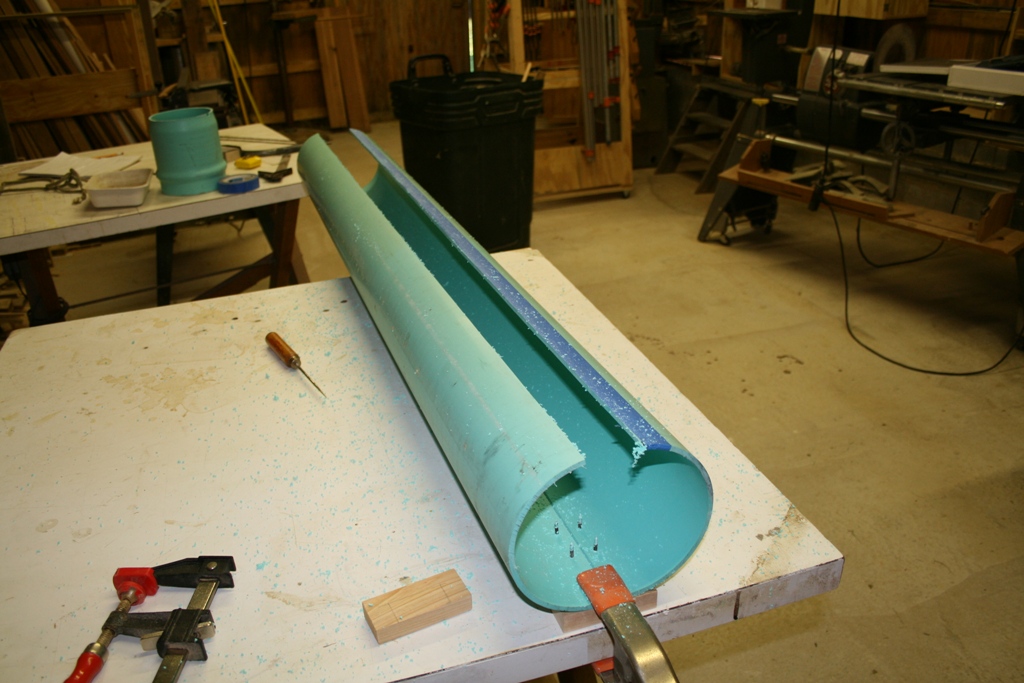
Repeat the tape thing on the other two marks and then again, cut with the jigsaw.
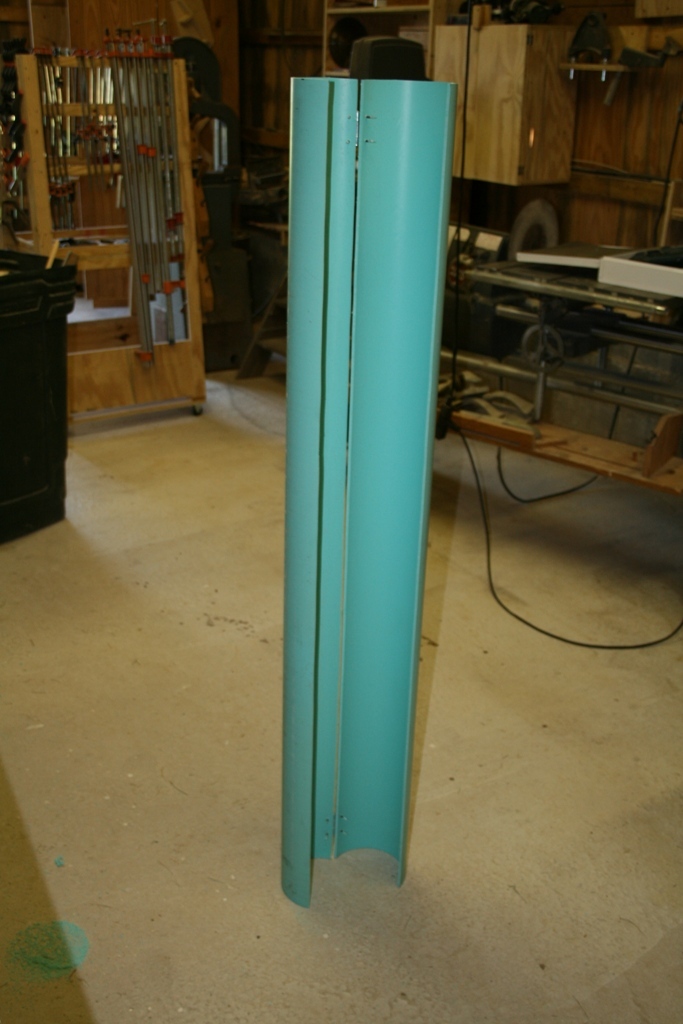
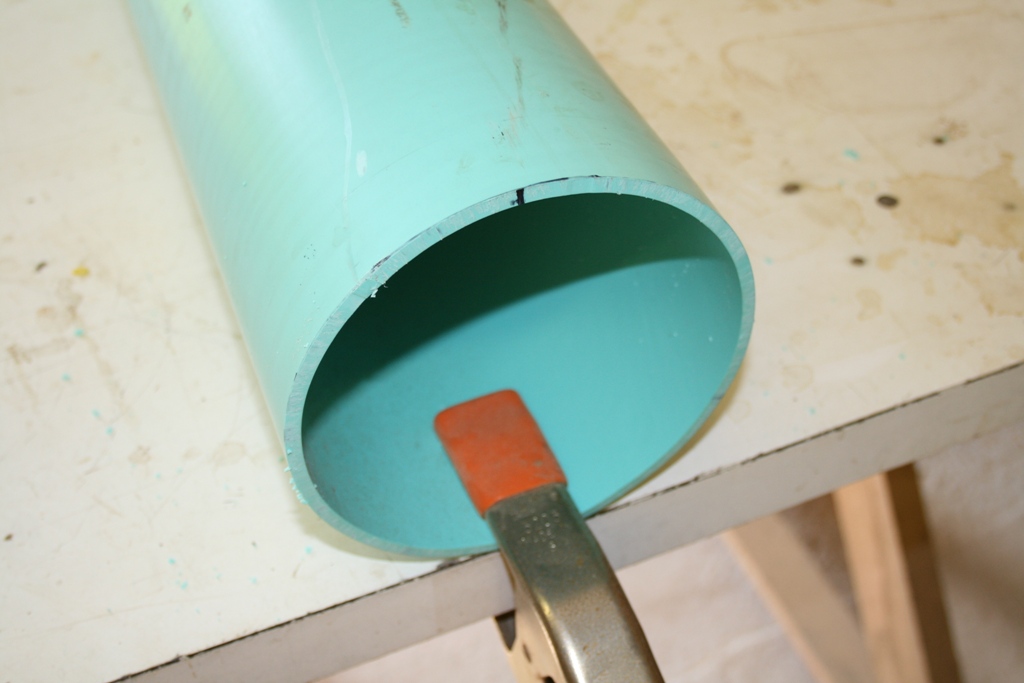
And this is what you should end up with.
Now for the top. This holds the tube together and locks it around the pole.
Measure the inside of your 8" PVC sewer pipe.
Take your 8" x86" piece of plywood, (or whatever wood you used) find the dead center of it and using a compass, draw a circle that is exactly the inside diameter of your tube.
Next, you need to cut a hole in the center that is just barely bigger than the pole it is going to fit around.
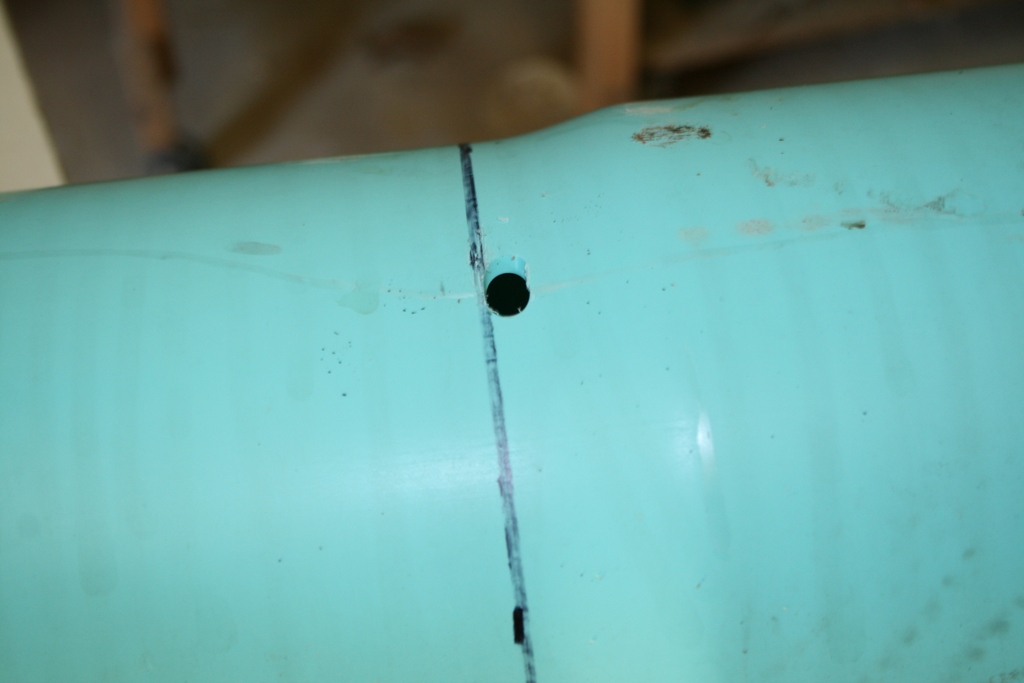
Then, you need another smaller hole that is just big enough to allow your rope (or winch cable) to pass thru. (This is assuming your pole has a cable/rope system). Locate this about half way between the edge of the disk and the pole hole.
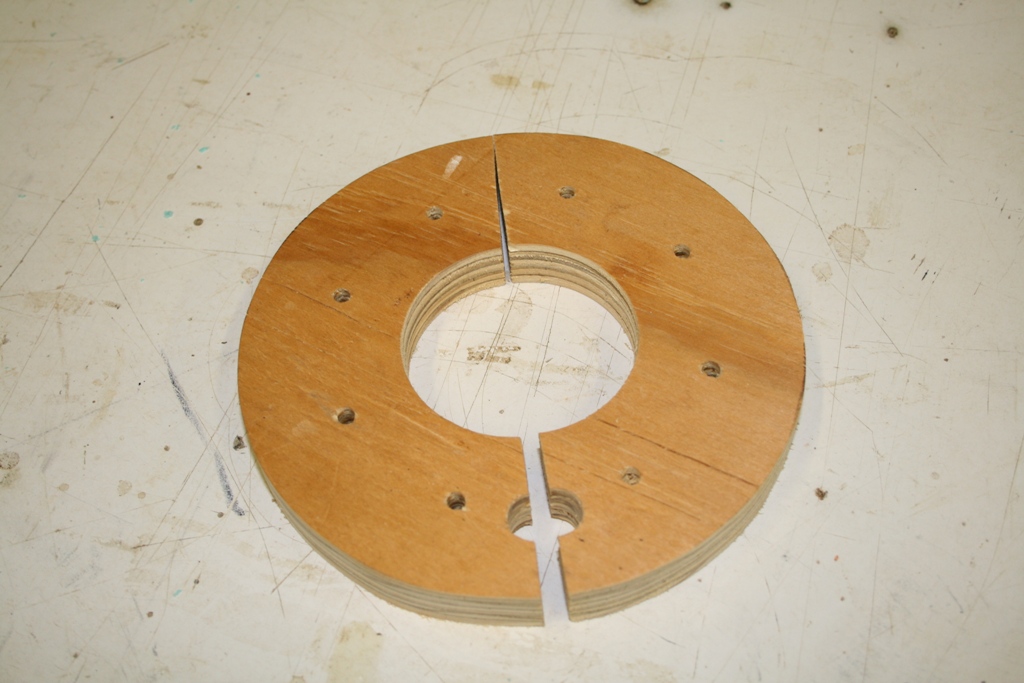
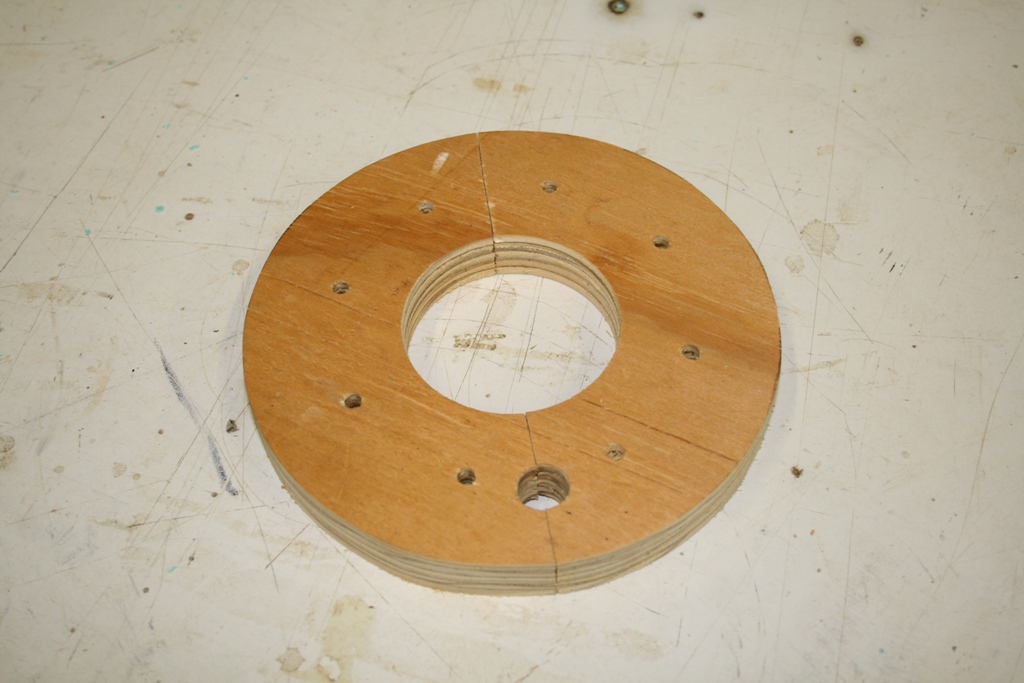
Finally, draw a straight line thru both the center and rope hole and then cut it in half using your jigsaw.
You should end up with a round, but split, disk as shown here.

Now you have to add your disk to the tube. To do so, look at the picture here.
Take half of the disk and, with the 'rope hole' towards the 'hinged' side of the tube, carefully place it in, and level with the top of the tube. Slide it around until the edges of it and the cut tube line up. Then, in the side of the tube, 3/8" down from the top, pre-drill a hole for the 1 5/8" decking screw thru the PVC tubing and into the plywood. Add that screw, now! This will hold the piece in place while you pre-drill 2 more holes, one towards the hinged side and one towards the front of the tube as shown. Now add the other 2 screws. I only used 3 screws per side.
Repeat this procedure for the other side of the disk.
Note:
Yes, any screws into the side of plywood should be pre-drilled or the plywood will split.

Now, all that's left to do is add the screen door clasp. Close the tube tight. Mark and pre-drill the holes for the clasp and then make sure that it is snug. I like to use the ones that have a little spring lock on them. Once closed, they don't 'accidentally' come apart.
The reason the clasp is on the opposite side of the rope/cable hole is so that you'll have more room, not only to add the clasp, but the rope/cable is on the opposite side of the pole, out of the way when operating the clasp.
Lock it and give it a test to make sure it works.
Essentially, the construction of the guard is done.
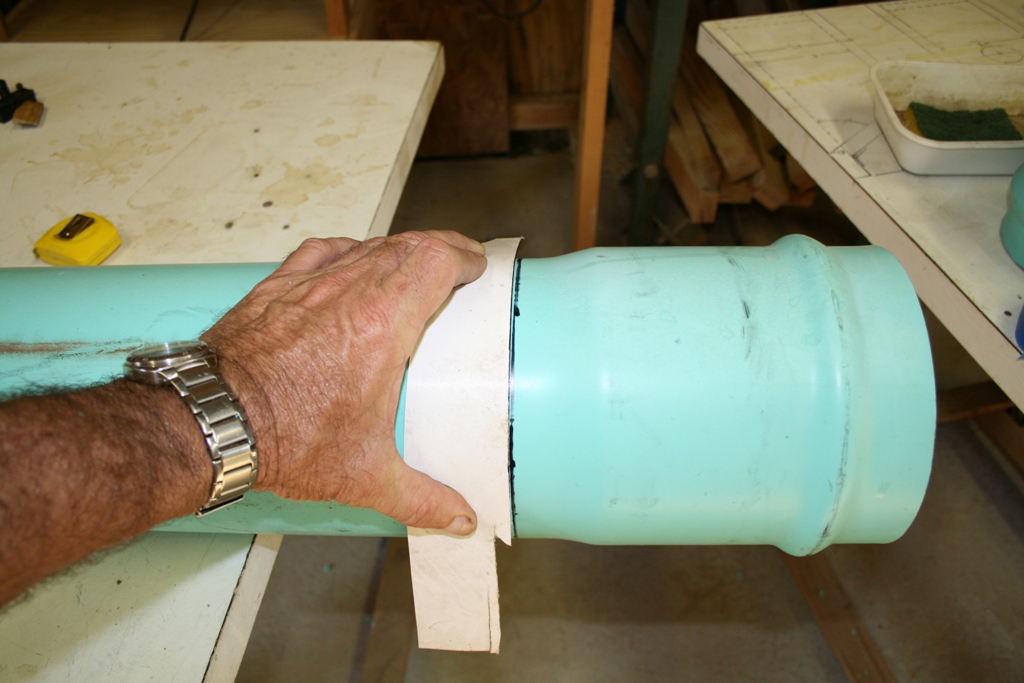
Now, take it out to the pole and make sure it fits on the pole...don't want to paint it and then find that you have to 'tweak' it and ruin your paint job.
Question?
Do I really need to make this top disk?
Absolutely!
NEVER put any kind of deep hollow tube of any kind around a martin pole without some kind of barrier that a martin or fledgling, or any other kind of bird for that matter) could fall down inside and not be able to get back out. It would be a death trap for them.
Plus, the disk and clasp holds the top of the guard together and in place.
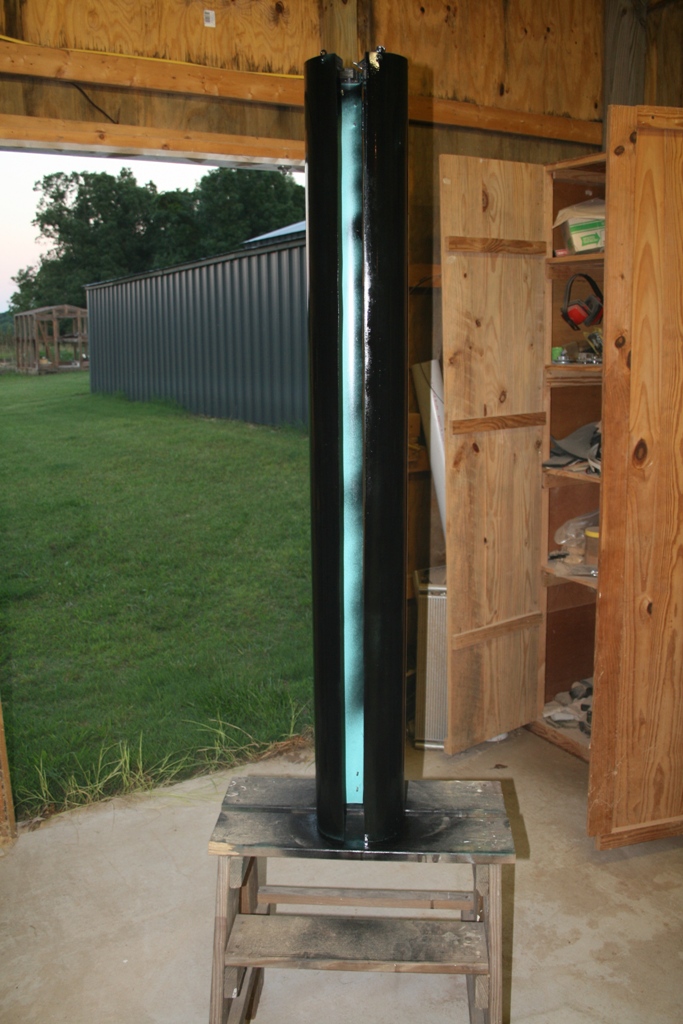
Finally, now that you know it fits the pole, all that's left to do is give it a good coat of paint. Get the kind that is made to stick to plastic. (I used Valspar from Lowe's). Regular paint will just peal off. I used black because my poles are black, but you can use whatever color suits your fancy.
And there you have it. A simple, easy to make and 'effective' piece of protection for your martins.
For years, I've worked on a number of different styles and types of predator guards to protect my martins, and each time I tried to make it simpler. So far, this is the simplest while at the same time, still have it work. I've talked with a large number of folks that use large diameter PVC tubing and all of them say the same thing, "They work", and that's the important thing. The cost isn't too bad and I think just about anybody can follow the above page and make one (or more). Yes, I know, there are those that will say that 4" or 6" is much 'cheaper', but remember, the smaller you go, the easier it is for a large rat snake to make it up the pole and that's the last thing you want. In fact, by using the smaller guard, you really haven't accomplished anything.
For even more protection, I added an additional bird netting guard to mine. http://chuckspurplemartinpage.com/snakgard.htm
And yes, if you cannot find (or afford) the tubing, the netting guard will work all by itself.
Because I do nest checks and have to lower my racks/houses below the 4 1/2' mark, I need my guards to come off the pole, thus the reason for cutting them in half and adding hinges.
How snakes climb poles of any kind.
Snakes climb round objects like poles by 'constricting' their bodies around them and 'hitching' their way up the pole. Snakes can easily climb up over anything that is less than half the length of their body. They simply push the front half of their bodies straight up and over the obstruction. But if it's taller, then they have to wrap around it to hitch up the pole. In this case, the outside diameter of the tubing is 8 1/4". So, using a little math, (Pi D = C), so 8 1/4 x Pi = 25.9" circumference. This means the snake would use up nearly 30 inches of its body length just to wrap around the tube one time, not much left to wrap twice and hitch up.
However, they don't usually wrap all the way around the pipe. Instead, they stay on one side of the pipe and zigzag up one side, thus allowing the top part of their bodies to constrict on the pipe while pulling the lower half of their bodies up and getting a new hold to push the front half up and so on, and before too long, they are up the pole.
Plus, one last thing! This stuff is slick, so even if they did get a start, they'd have a heck of a time holding on, and that's a good thing.
I hope you make one (or more) and use them. It'll give your martins a little more added protection from one of the deadliest ground predators there is for baby birds of any kind.
Oh, and one last thing. I've been asked what to do if the pole has a winch on it. Simple! Just raise the guard up so that it sets on the winch and then add a piece of Velcro at the very bottom to hold it together. It works like a champ.